Java programmer expert

Here is the second part of the series with instructions on installing the Java IDE. In the last part we covered the installation of the Java and Apache Netbeans IDE on Windows. And in the third part we covered the installation of Java IntelliJ IDEA. Today we’re going to show you how to install Java and the Eclipse IDE on a Windows machine, step by step.

V článku sa dozvieš:
Eclipse is open-source software, popular among Java developers because it is a Java-based development environment that has been around for more than 20 years. In that time, it has built up a huge user community. It has a wide range of plugins to help you customize the environment to suit your project. Eclipse supports multiple languages such as Java, C, C++, HTML, PHP and many more. In addition, Eclipse includes advanced tools such as DOCKER to better organize your project packages and support for GIT to track changes to existing files.
However, it is important to note that the choice of an IDE (integrated development environment) is subjective and depends on personal preferences and project requirements. Some developers may prefer NetBeans or IntelliJ IDEA over Eclipse out of personal preference. It’s always a good idea to try out different IDEs and see which one suits you best.
Before we start, it’s important to mention that Java is always installed before Eclipse, as it depends on it and will save you unnecessary trouble later.
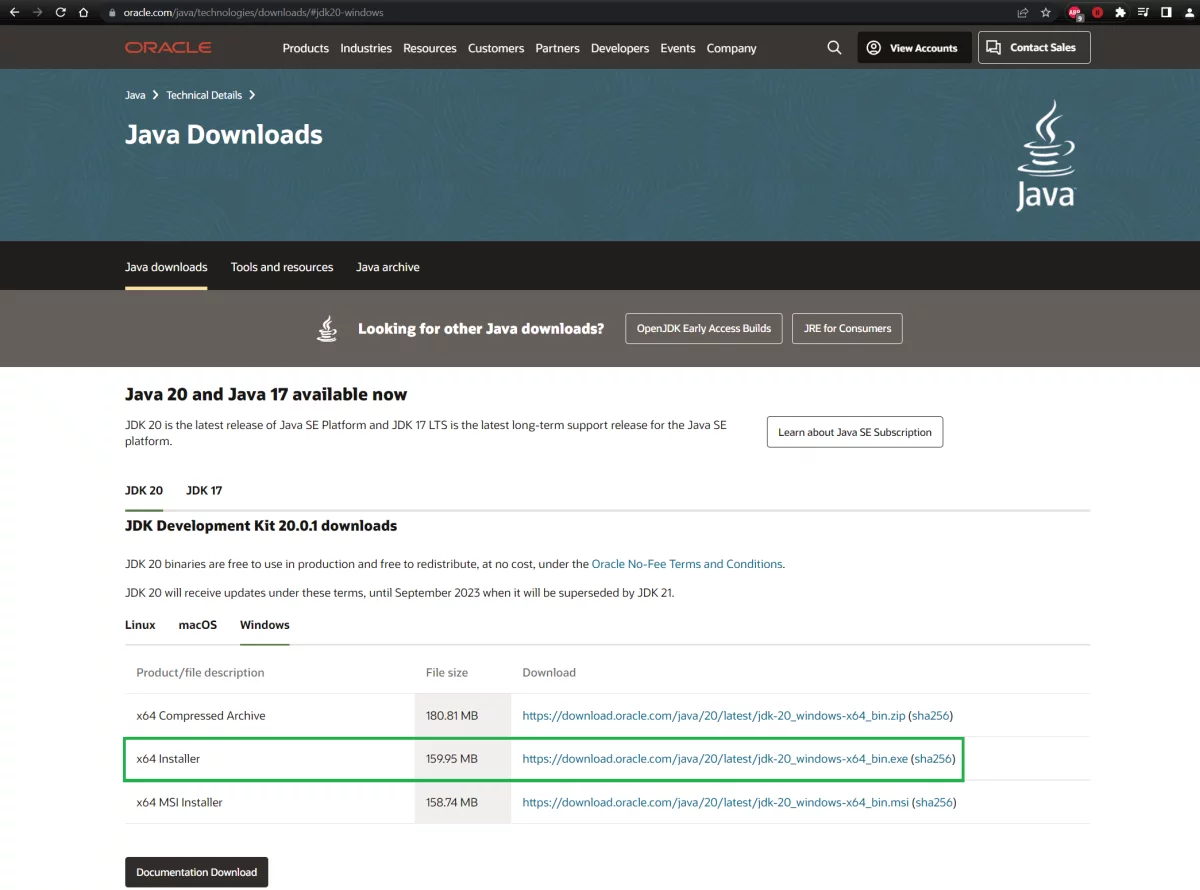
Step 1: Download the latest version of Java from the official website – Java download:
There are Windows, Linux and MacOS versions available. Select the Windows version.
Step 2: Once the download is complete, double-click on the downloaded file to start the installation.
Step 3: Click Next and select the path where you want to install Java (we recommend leaving the default path), then click Next to start the installation.
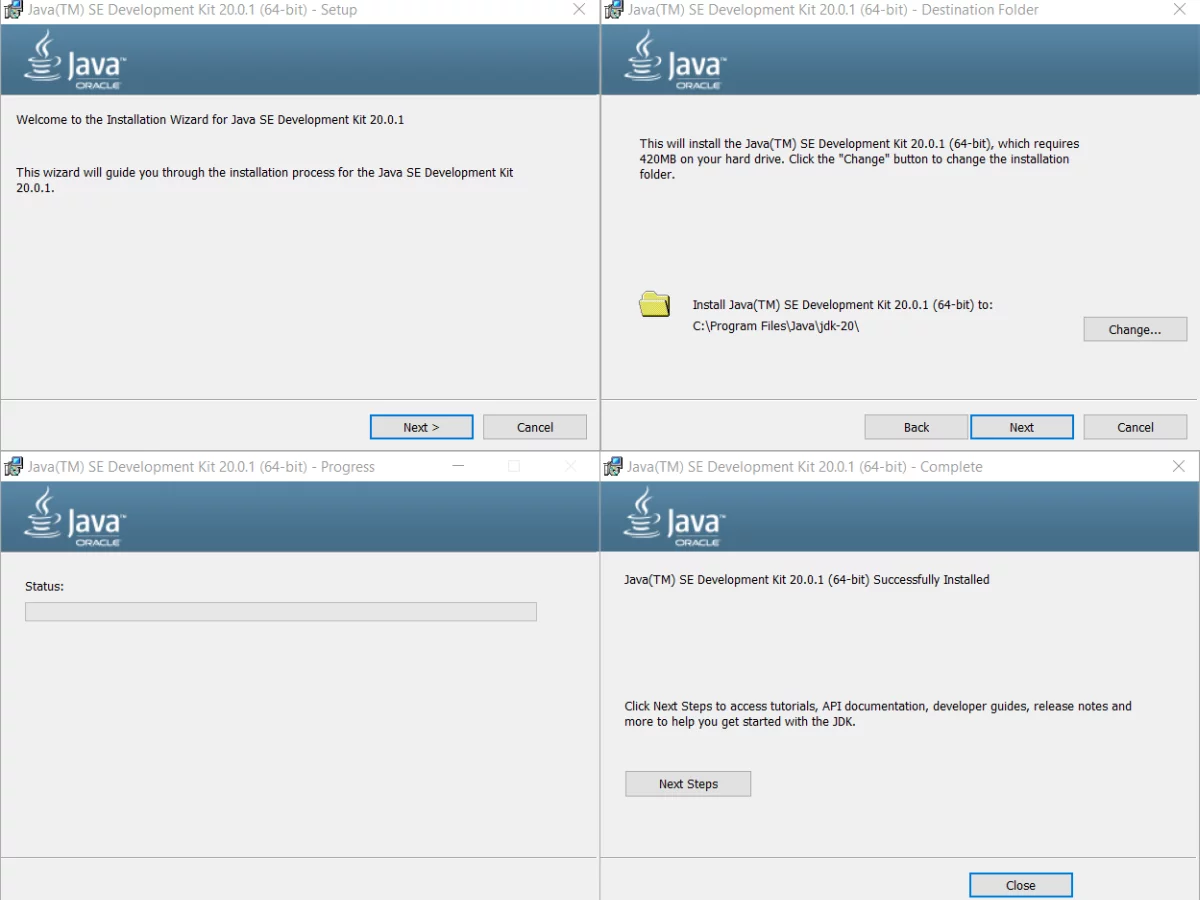
Step 4: Once the installation is complete, you can still view the documentation on the Oracle website by clicking the Next Steps button.
Click Close to complete the installation process.
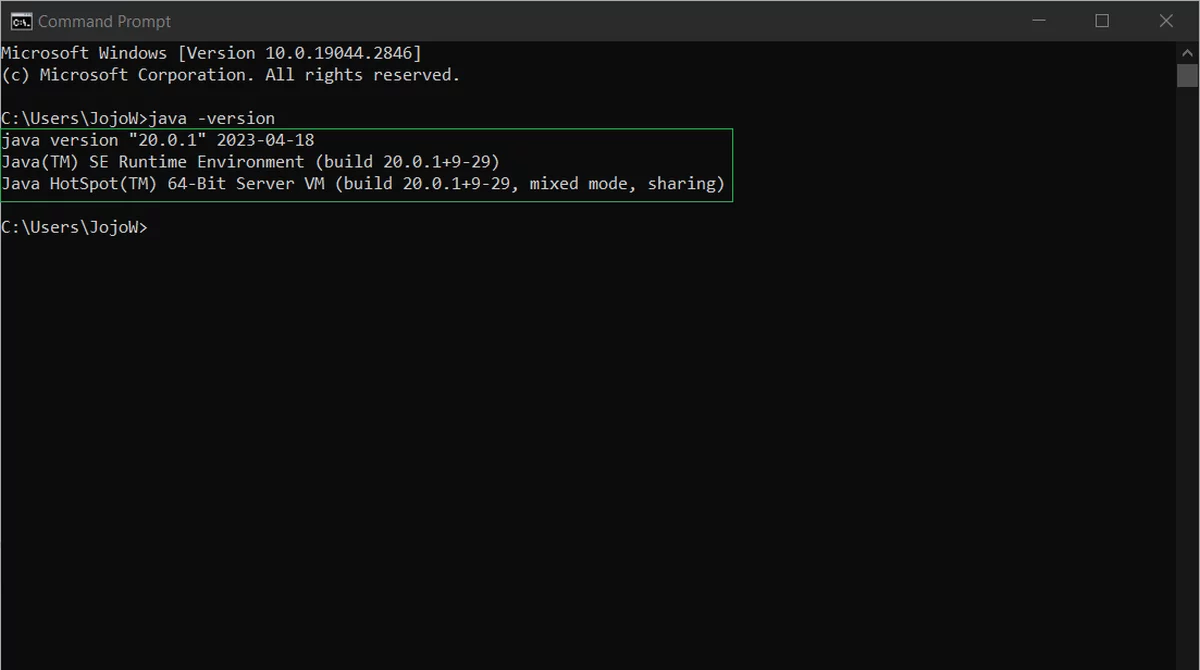
Step 5: Verify that Java is correctly installed by opening a command prompt (cmd command) and typing java -version. If Java is installed correctly, the version number should be displayed.
Now that we have our preferred version of Java installed, we will install the Eclipse IDE.
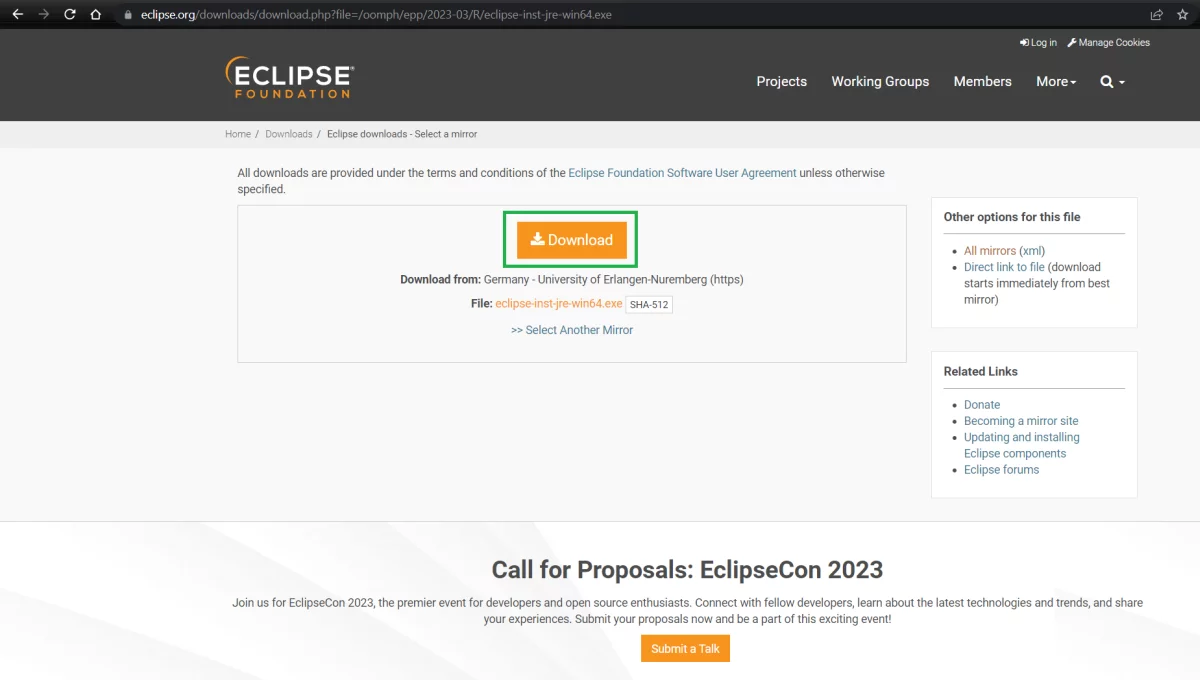
Step 1: Download the latest version of Eclipse from the official website – Java Eclipse download.
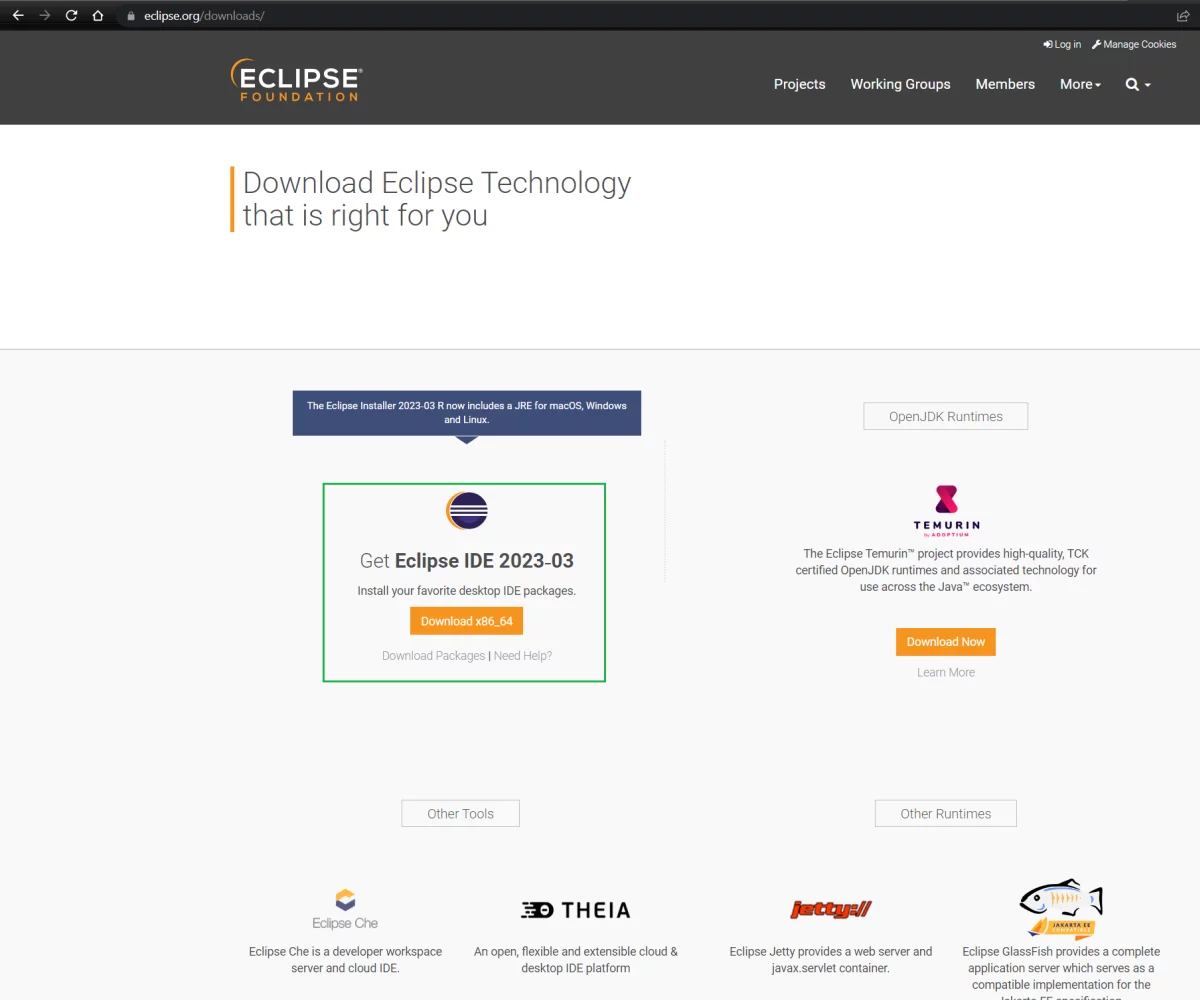
Step 2: Downloading the Eclipse IDE for Java developers is easy as it will automatically offer the latest version of the program and the default download location. Press Download on both screens.
Step 3: Once the download is complete, double-click the Eclipse executable file to launch the Eclipse installer.
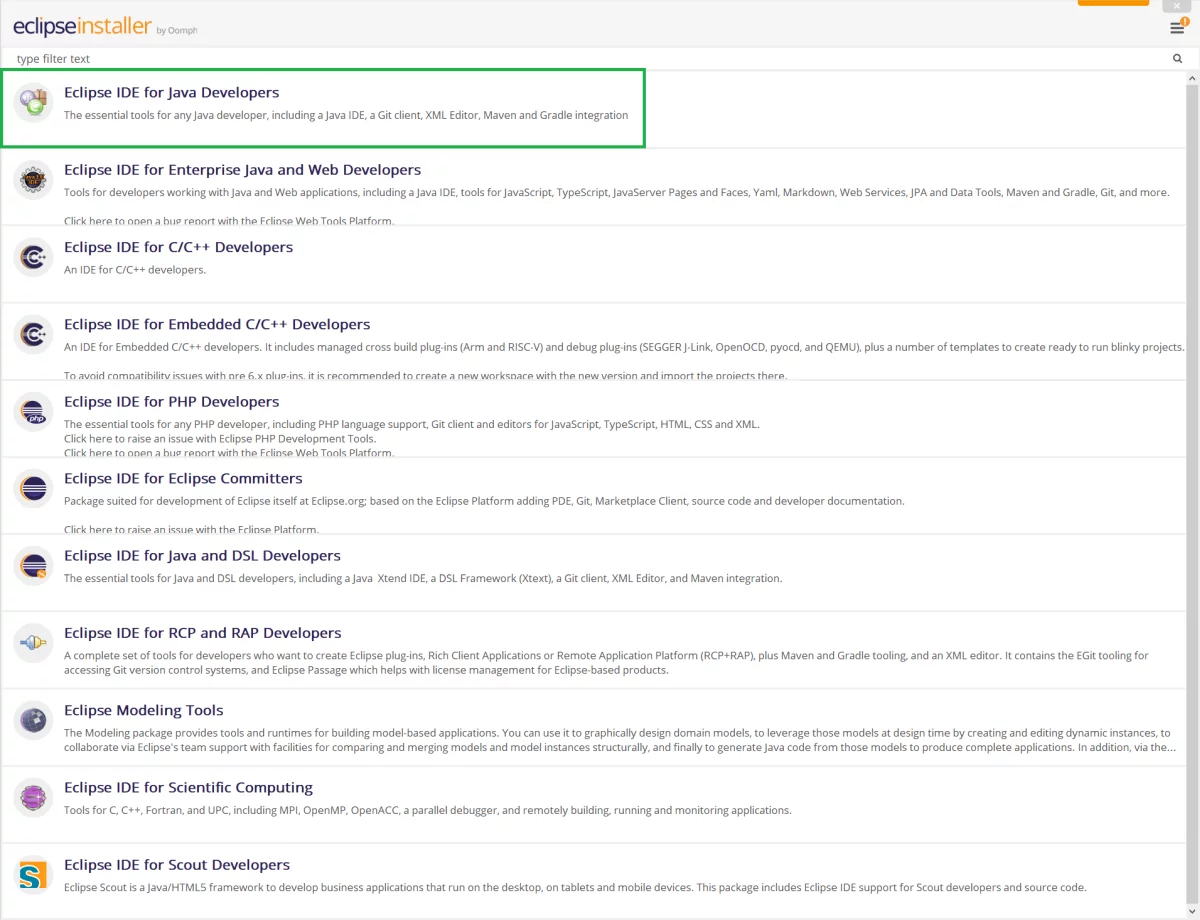
Step 4: You will be given the opportunity to select the Eclipse configuration that suits your needs. Select the first option as we will be using Eclipse primarily for Java application development.
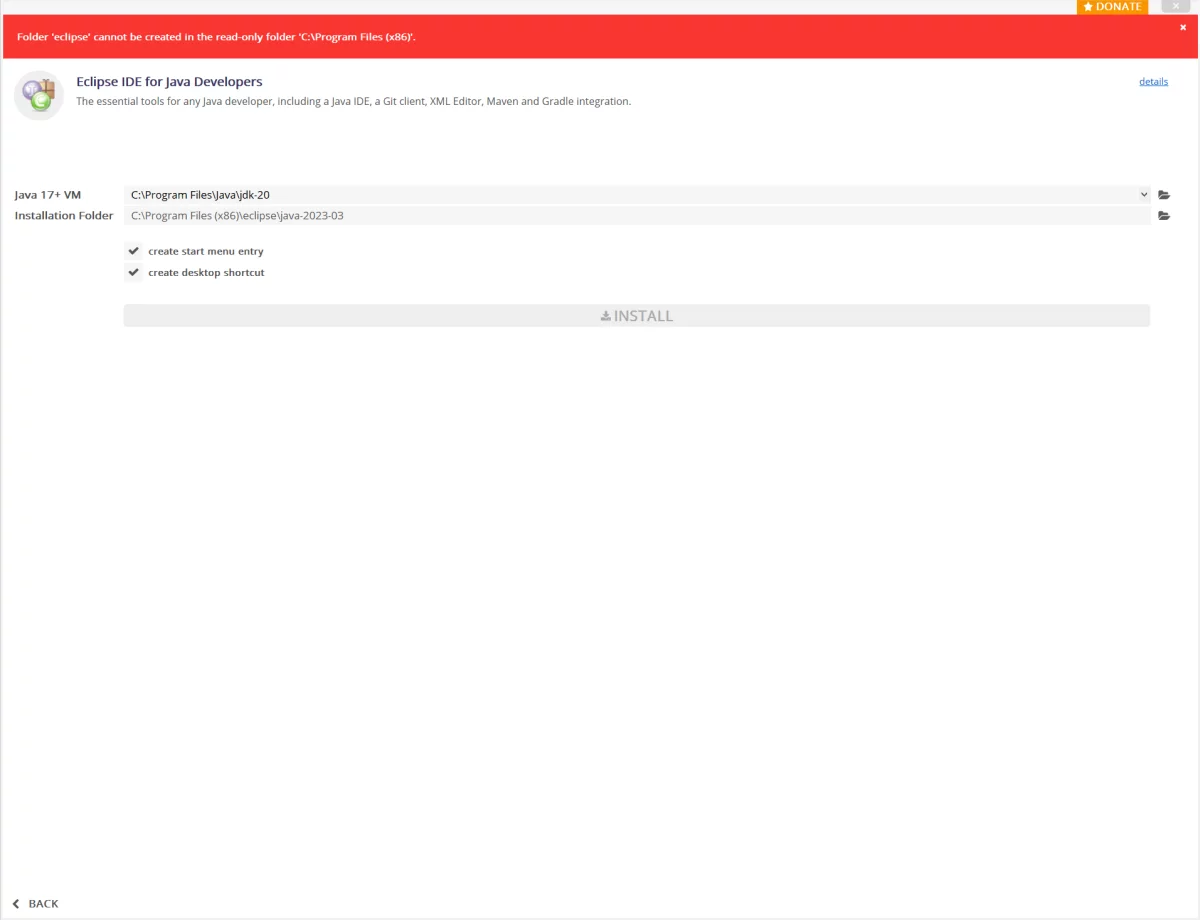
Step 5A: The following screen allows you to select the installation directory. However, if you see a red rectangle with an error, it means that the directory you have selected is read-only, so you will need to re-run the Eclipse installation, this time with administrator privileges. Alternatively, select another directory where you have write access.
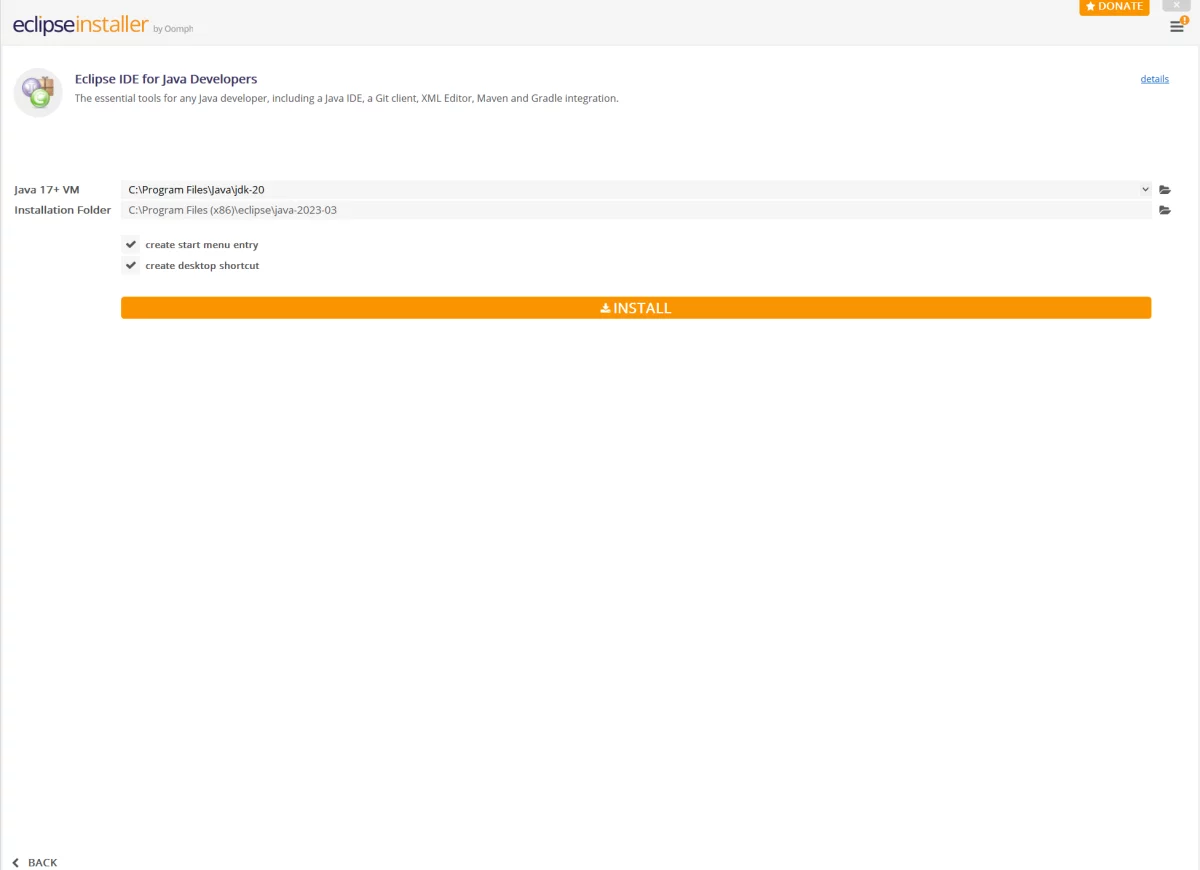
Step 5B: After running the Eclipse installation with administrator rights, the previous error message has disappeared and the Install button is available. Before you press it, you may notice that Eclipse has automatically detected where you have installed the Java JDK. Click on Install.
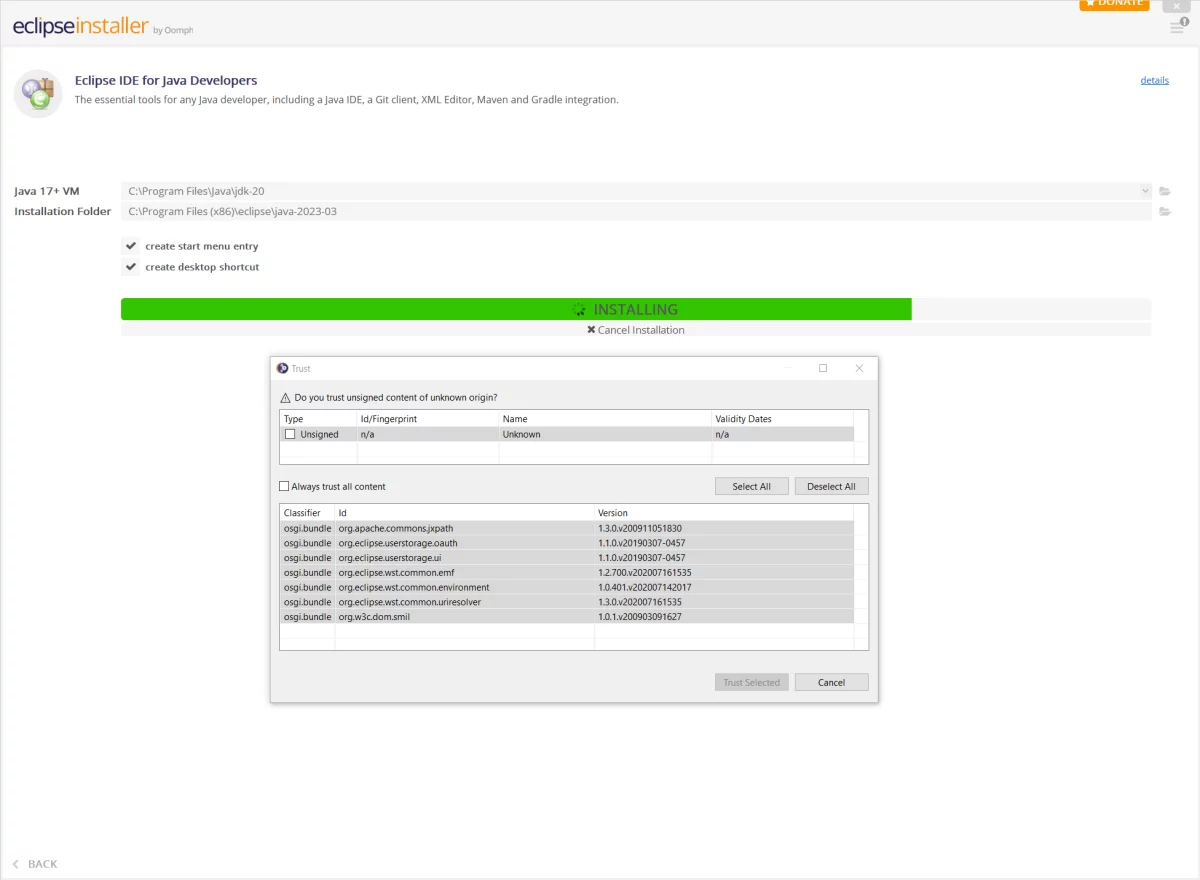
Step 6: During the installation, you may be surprised by a new window asking if you trust unsigned content. This happens because the Eclipse version does not yet know the latest versions of the identifiers from the JDK packages. Tick the Select All box and press the Trust Selected button.
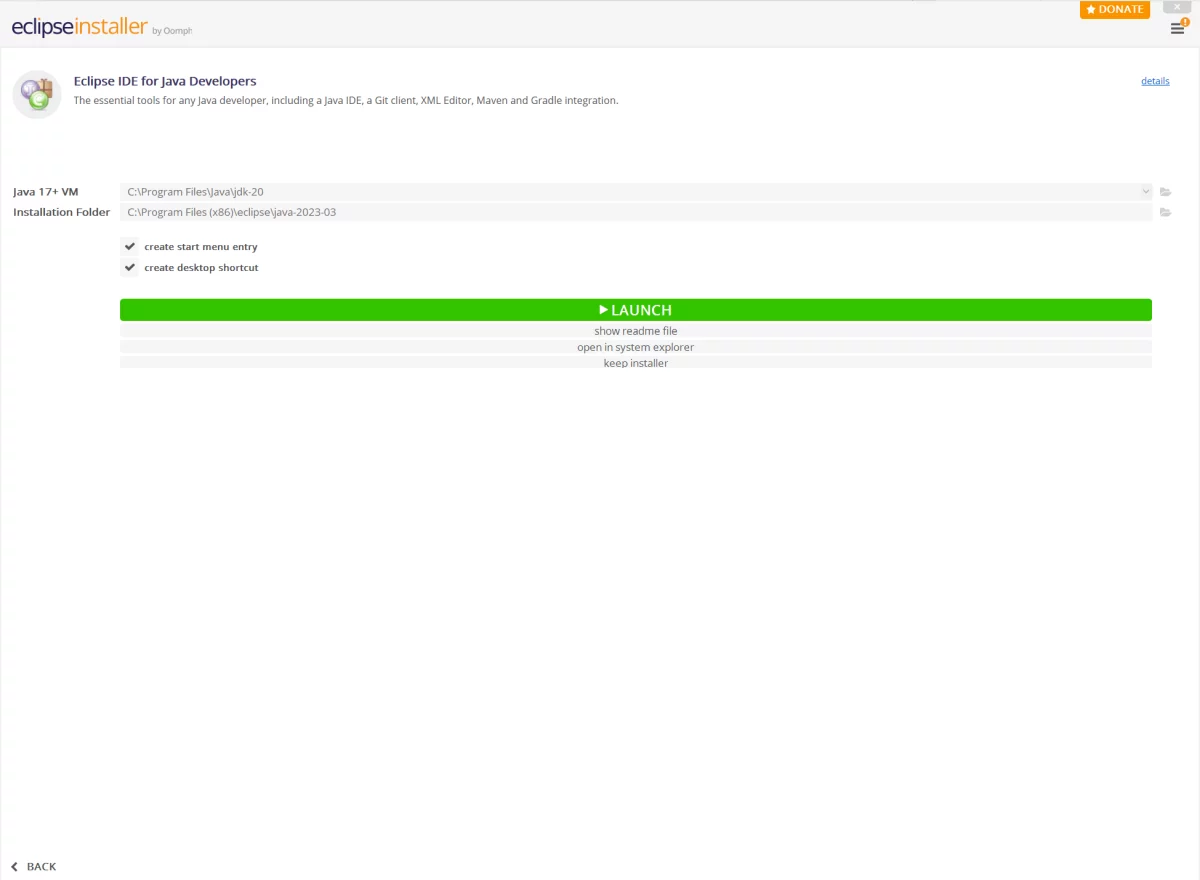
Step 7: If the installation is successful, click Launch to start Eclipse.
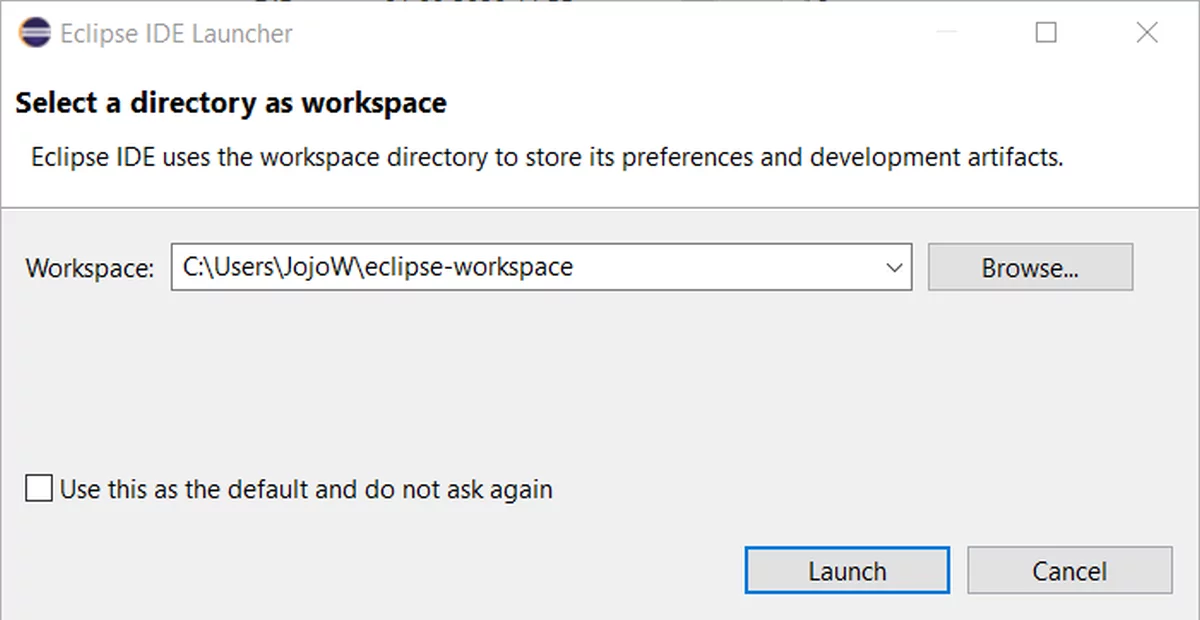
Step 8: In the initial window, Eclipse asks you where you want to create your workspace.
If you are happy with the default path, click Launch.
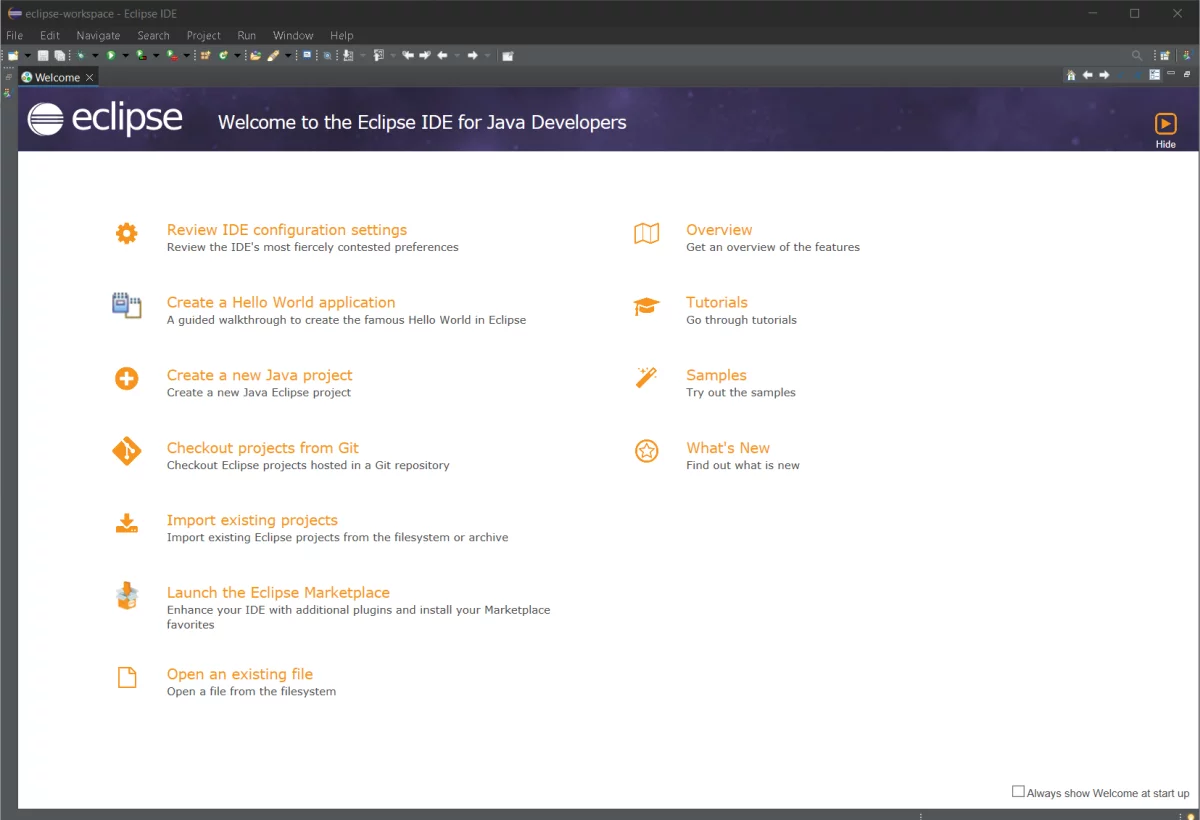
Congratulations! You have successfully installed Java and Eclipse on your Windows machine. You’re now ready to start programming in Java.

Related articles